---
title: Google Workspace SSO with ZITADEL
sidebar_label: Google Workspace
---
This guide shows how to enable login with ZITADEL on Google Workspace.
You can configure two types of SAML SSO on Google Workspace:
- [SSO profile for your organization](#sso-profile-for-your-organization)
- [Third-party SSO SAML profile](#third-party-sso-saml-profile)
Both profiles need to be configured differently.
Please make sure to configure your application for the correct type.
Please refer to Google Help to [Set up SSO for your organization](https://support.google.com/a/answer/12032922) in case you need additional information on the Workspace setup.
At this time Google supports SSO with OpenID Connect only for few providers.
Prerequisites:
- You need to have a domain registered with your Google Workspace account to configure SSO profiles
- Make sure that you [verify the same domain also in your ZITADEL organization and set it as primary domain](/guides/manage/console/organizations-overview#primary-domain)
- A user in Google Workspace (eg, road.runner@acme.com)
- A user in ZITADEL with the same username (eg, road.runner@acme.com); make sure you verify the domain to set the username. This is different than the user's email address
## SSO profile for your organization
### Configure SSO profile on Google Workspace
Open the Google settings for [SSO with third-party IdP](https://admin.google.com/u/1/ac/security/sso) and click on *ADD SSO PROFILE*.

Download the public certificate from your ZITADEL instance by requesting `${CUSTOM_DOMAIN}/saml/v2/certificate`
```bash
wget ${CUSTOM_DOMAIN}/saml/v2/certificate -O idp.crt
```
Always replace `${CUSTOM_DOMAIN}` with your Custom Domain.
Use the following settings
| Setting | Value |
| --- | --- |
| Set up SSO with third-party identity provider | Enable (check) |
| Sign-in page URL | `${CUSTOM_DOMAIN}`/saml/v2/SSO |
| Sign-out page URL | `${CUSTOM_DOMAIN}`/saml/v2/SLO |
| Verification Certificate | Upload the certificate (idp.crt) |
| Use a domain-specific issuer | Enable (check) |
| Network masks | Leave blank|
| Change password URL | `${CUSTOM_DOMAIN}`/ui/console/users/me?id=security |
### Create a SAML application in ZITADEL
Create a new .xml file with the following minimal SAML metadata contents:
```xml
```
Set or replace the variables with the values from the next screen as follows:
- `${ENTITYID}`: `google.com/a/`
- `${ACSURL}`: `https://www.google.com/a//acs`
`` is the domain you have verified in Google Workspace.
In your existing project:
Press the "+"-button to add an application

Fill in a name for the application and chose the SAML type, then click "Continue".

Either fill in the URL where ZITADEL can read the metadata from, or upload the metadata XML directly, then click "Continue".
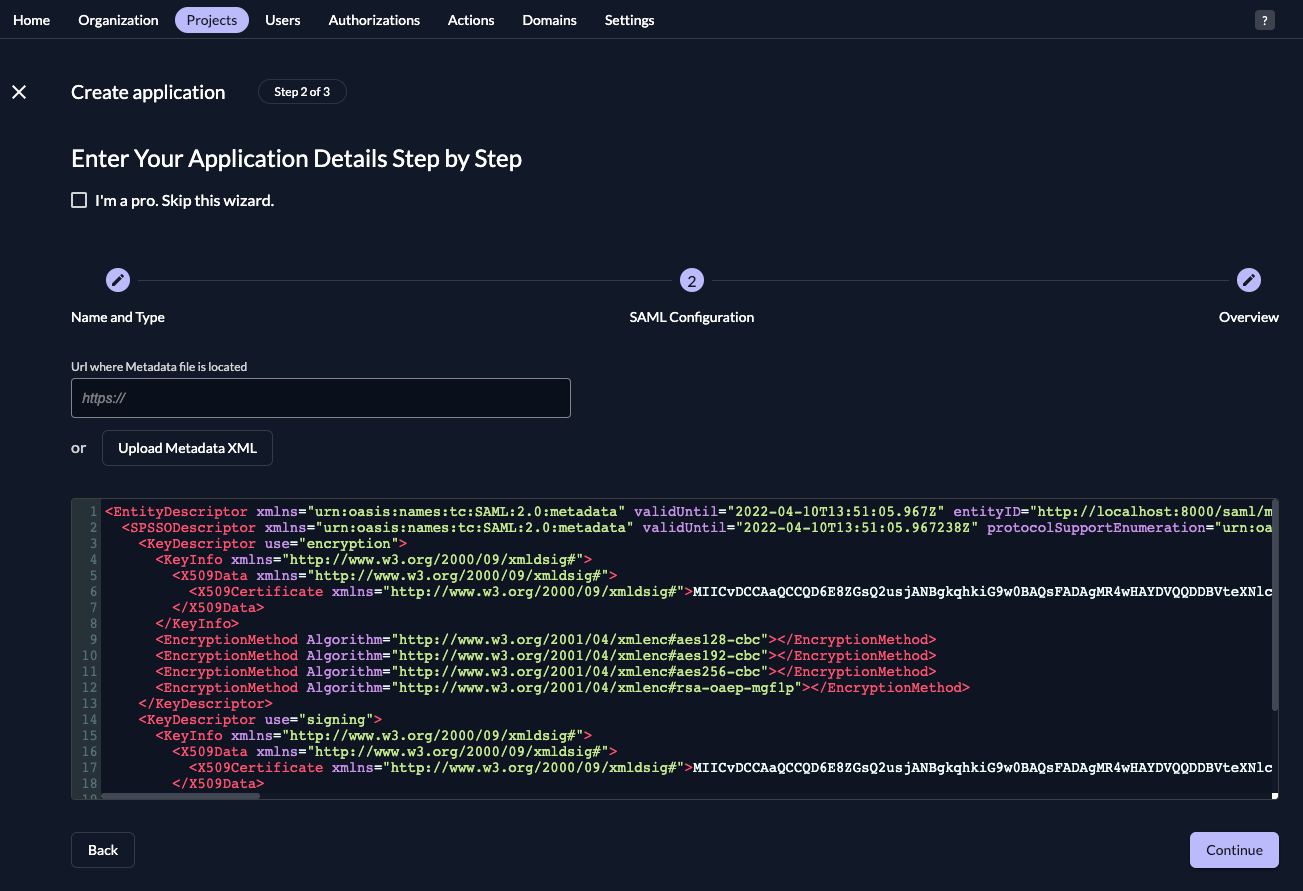
Check your application, if everything is correct, press "Create".

### Activate the SSO profile for your organization
Make sure to enable the SSO profile for your organization.
In the [domain-specific service URLs](https://admin.google.com/u/1/ac/security/sso/domain-specific-service-urls) settings select "Automatically redirect users to the third-party IdP in the following SSO profile" and select as SSO profile "SSO profile for your organization".

Save the settings.

### Verify the SSO profile for your organization
Now you should be all set to verify your setup:
- Open Gmail in an incognito session with the following link: `https://mail.google.com/a/`
- Enter your username and credentials
- You should be redirected to Gmail and logged in
`` is the domain you have verified in Google Workspace.
## Third-party SSO SAML profile
Configure a third party SSO SAML profile and login users with ZITADEL to Google Workspace.
### Add SAML profile on Google Workspace
Open the Google settings for [SSO with third-party IdP](https://admin.google.com/u/1/ac/security/sso) and click on *ADD SAML PROFILE*.

Download the public certificate from your ZITADEL instance by requesting `${CUSTOM_DOMAIN}/saml/v2/certificate`
```bash
wget ${CUSTOM_DOMAIN}/saml/v2/certificate -O idp.crt
```
Always replace `${CUSTOM_DOMAIN}` with your Custom Domain.
Use the following settings
| Setting | Value |
|--------------------------|----------------------------------------------------|
| SSO profile name | ZITADEL SSO |
| IDP entity ID | `${CUSTOM_DOMAIN}`/saml/v2/metadata |
| Sign-in page URL | `${CUSTOM_DOMAIN}`/saml/v2/SSO |
| Sign-out page URL | `${CUSTOM_DOMAIN}`/saml/v2/SLO |
| Change password URL | `${CUSTOM_DOMAIN}`/ui/console/users/me?id=security |
| Verification Certificate | Upload the certificate (idp.crt) |
Now go ahead and click *SAVE*
### Entity ID and ACS URL
Open the Google settings for [SSO with third-party IdP](https://admin.google.com/u/1/ac/security/sso) and click on the SAML Profile *ZITADEL SSO*

You can copy the "Entity ID" and "ACS URL" from the "SP details" section.

### Create a SAML application in ZITADEL
Create a new .xml file with the following minimal SAML metadata contents:
```xml
```
Set or replace the variables with the values from the next screen as follows:
- `${ENTITYID}`: `https://accounts.google.com/samlrp/metadata?rpid=`
- `${ACSURL}`: `https://accounts.google.com/samlrp/acs?rpid=`
Replace `` with the values from the [SSO profile](#entity-id-and-acs-url).
In your existing project:
Press the "+"-button to add an application

Fill in a name for the application and chose the SAML type, then click "Continue".

Either fill in the URL where ZITADEL can read the metadata from, or upload the metadata XML directly, then click "Continue".

Check your application, if everything is correct, press "Create".

### Activate the SSO profile
Make sure to enable the SSO profile.
In the [domain-specific service URLs](https://admin.google.com/u/1/ac/security/sso/domain-specific-service-urls) settings select "Automatically redirect users to the third-party IdP in the following SSO profile" and select as SSO profile "ZITADEL SSO".

Save the settings.

### Verify the SAML SSO profile
Now you should be all set to verify your setup:
- Open Gmail in an incognito session with the following link: `https://mail.google.com/a/`
- Enter your username and credentials
- You should be redirected to Gmail and logged in
`` is the domain you have verified in Google Workspace.
### Troubleshooting
Make sure you don't use a super admin account in Google Workspace to test SSO. Super Admin users are not allowed to login with SSO and you might receive an status code 500.